Our browser extension does one job. It puts this browser behind one of your proxies and takes it back off, in one click, without the password box Chrome and Firefox love to throw at you. After every connect it shows the IP the world now sees, so you never have to take the connection on trust. This guide goes from nothing installed to a checked exit IP, then sets up the two habits that save grief later: keeping some sites off the proxy, and testing a proxy before you lean on it.
Already happy with an extension you know? The SwitchyOmega and FoxyProxy guides still stand. This one is about ours, and about the few places it behaves differently.
Step 1: install it
- Open the store page for your browser: Chrome Web Store or Firefox Add-ons, and add it from there. The same two links sit on the Apps & extensions page of your dashboard, under Install.
- Pin it. Chrome hides new extensions behind the puzzle-piece icon, and you will be clicking this one a lot. In the toolbar it is called Proxynator: it takes other providers’ proxies too, so it wears its own name rather than ours.
Step 2: feed it proxies, three ways
Sign in to the dashboard in the same browser. That is the whole trick: the extension notices the signed-in dashboard and links your account by itself. Its Sources page then shows ProxyMonkey as Connected, with how many proxies came across and when they last synced. If it has not picked you up, keep a signed-in dashboard tab open and press Import from this tab on the Sources page.
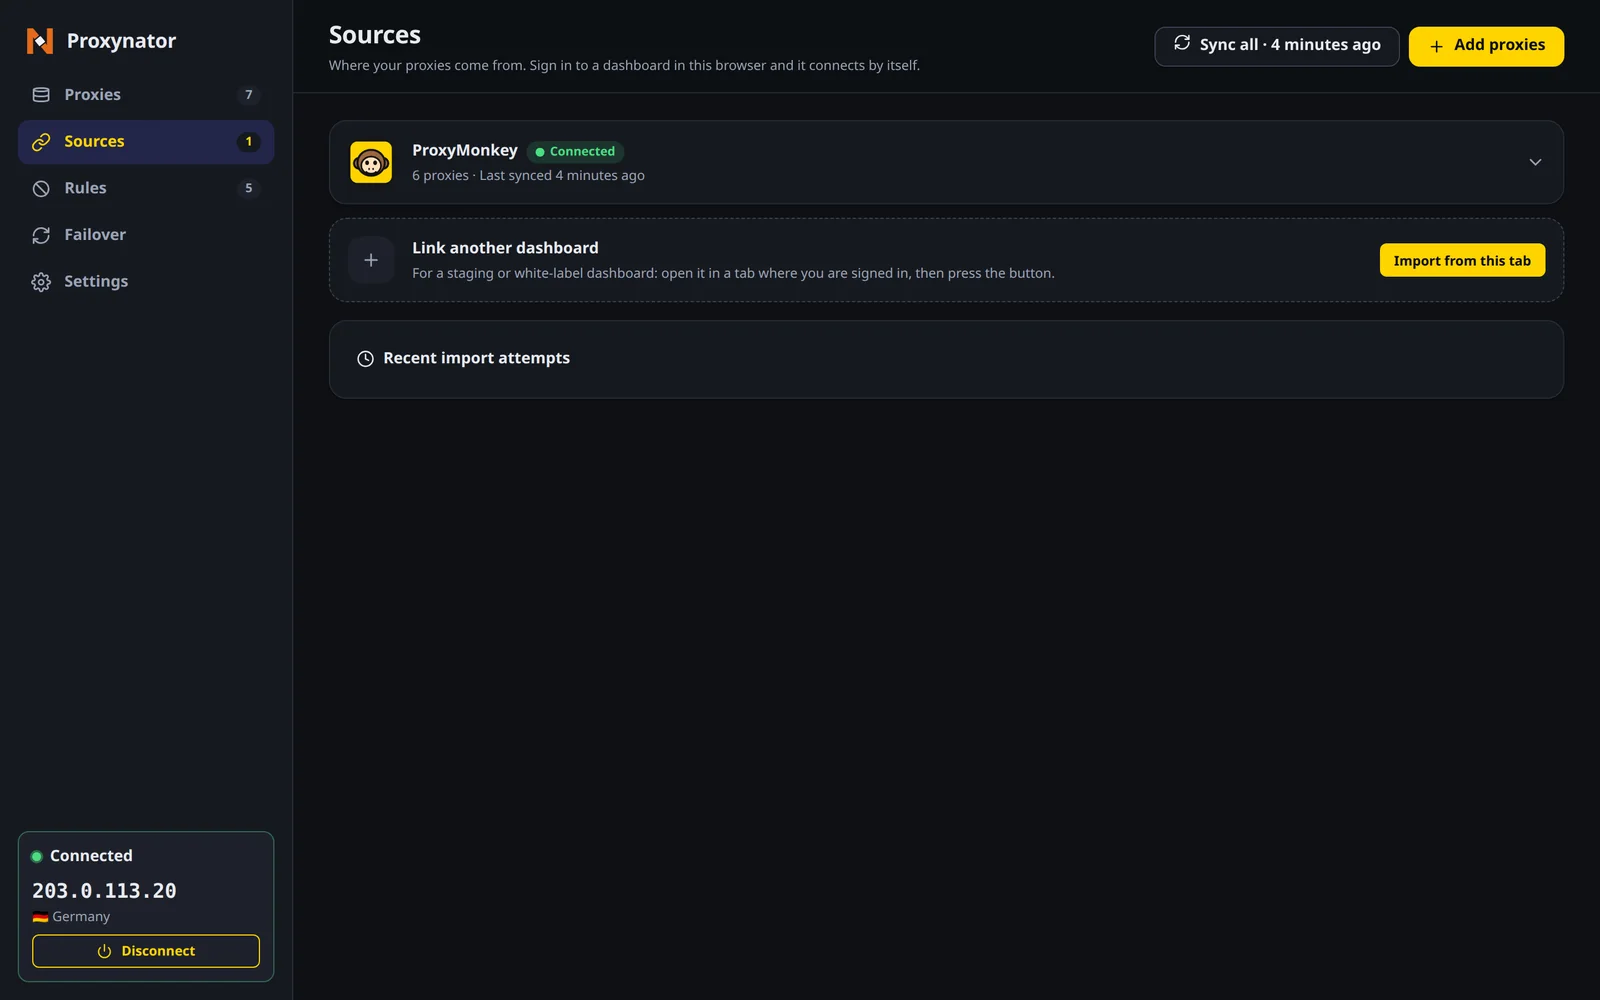
Copy one proxy across. Every proxy’s page in the dashboard has a Copy for extension button. It copies a code that starts with ext1.; in the extension, open Add proxies, expand Paste proxies or a dashboard code, paste, and press Import.
Paste a list. Same box, one proxy per line, in whatever shape your provider handed over: host:port:user:pass, user:pass@host:port or http://user:pass@host:port. Lines it cannot read come back with their line number and the reason, and the rest are imported. Every accepted format and every refusal is in paste any proxy format.
Proxies that come from your account are read-only in the browser. If you change a password, change it in the dashboard and press Sync all, rather than editing the copy.
Step 3: connect, then read the IP
Click the toolbar icon. The popup opens on One proxy, which means every site goes through the proxy you pick, except the ones on your bypass list. Click Connect on a proxy. The card says Connecting… while it checks the exit IP, then turns into Connected with the address in big monospace, its country, and a copy button.
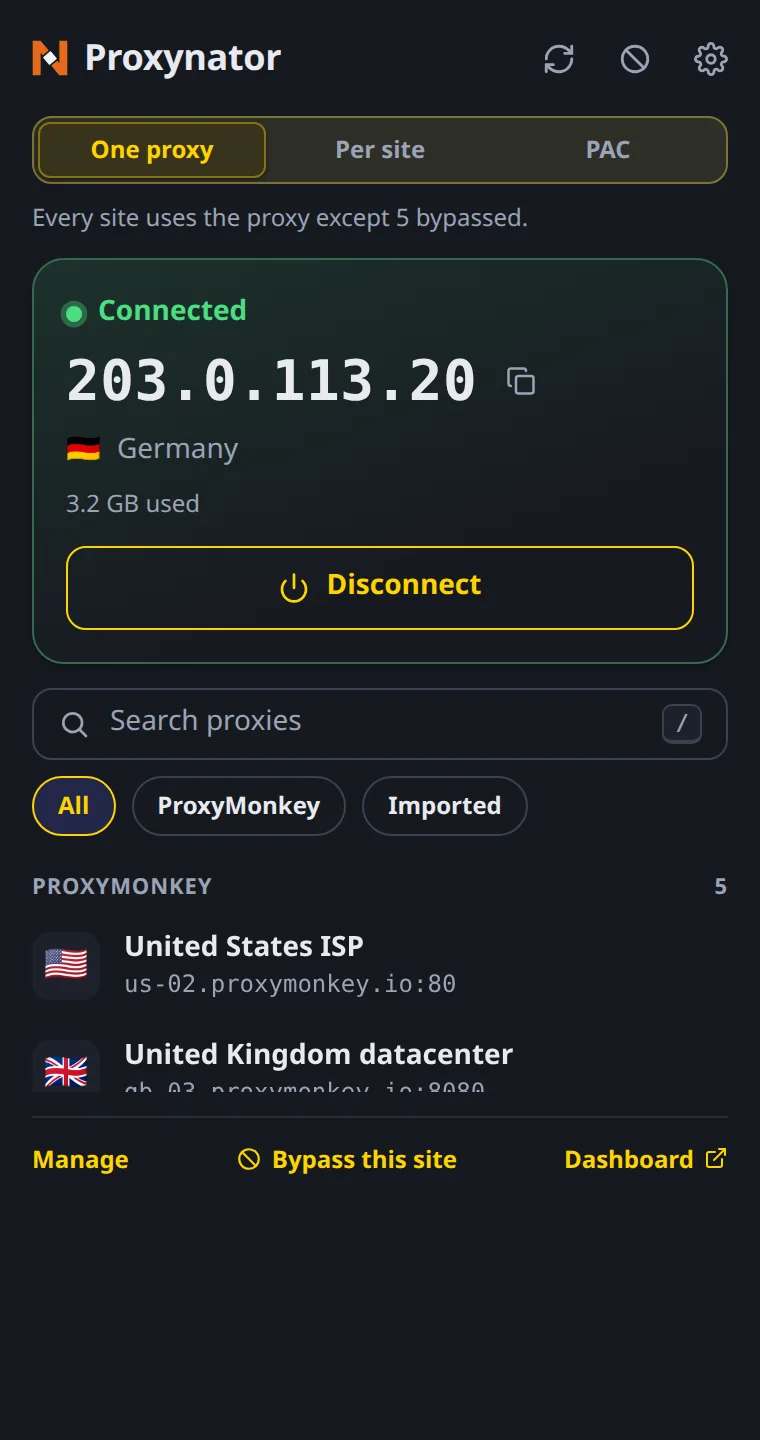
That card only goes green when it means it. The other things it can say:
- Proxy rejected the credentials. The username or password is wrong, or was just changed. Fix it, then press Check again.
- Proxy unreachable. Nothing answered at that address. Check the host and port, or whether the proxy has expired.
- Another extension controls the proxy. A browser has one proxy setting and one extension gets to hold it. Turn the other proxy extension off and connect again.
Disconnected and want back on? The card offers Reconnect to the last proxy you used.
Step 4: flip the two switches that are off by default
- WebRTC leak protection, in Settings. It stops the browser sending your real address over WebRTC while a proxy is on. It is off until you turn it on, because it needs one extra browser permission. The Chrome and Firefox guide shows how to test for the leak.
- Private windows. The browser decides whether an extension may run there. In Firefox, set Run in Private Windows to Allow, or private windows connect directly with your real IP. In Chrome, turn on Allow in Incognito, or a site opened there can stop and ask for the proxy password.
Step 5: keep some sites off the proxy
Out of the box the bypass list holds only local addresses: localhost, 127.0.0.1, [::1] and plain hostnames with no dot in them. Everything else goes through the proxy, your bank included. The popup’s Bypass this site link adds the tab you are on. For anything more careful than that, the bank guide covers the rule syntax, the Allow only mode that flips the whole idea round, and per-site rules that send different sites through different proxies.
Step 6: test before you trust, and let failover cover you
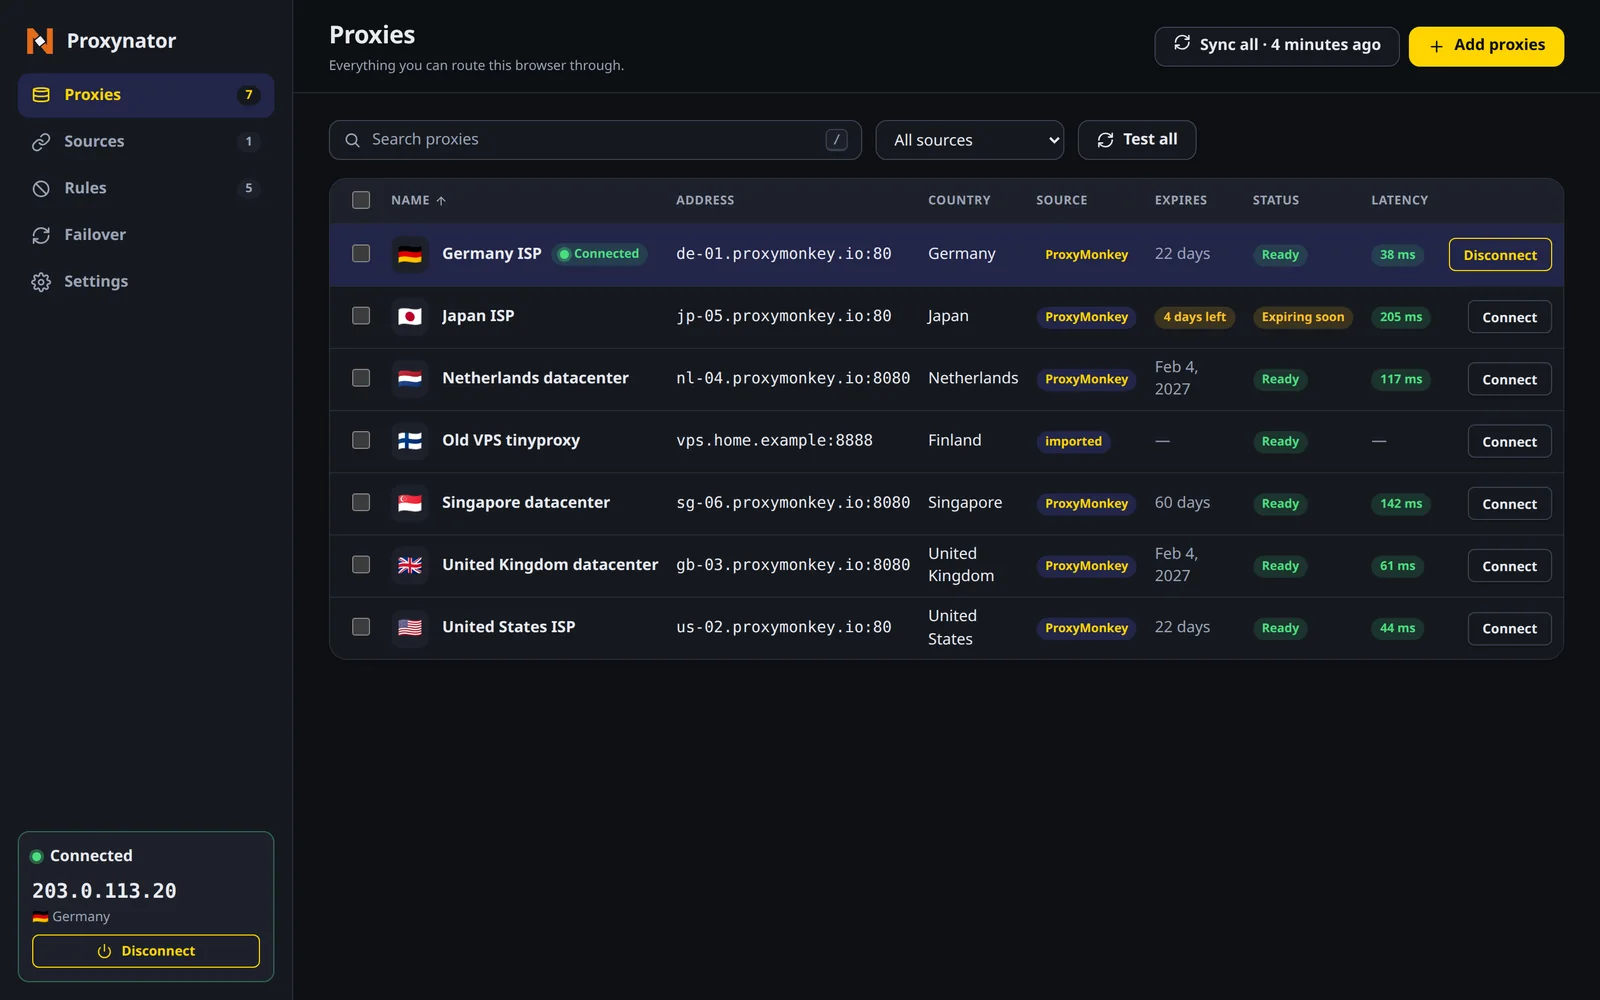
Click Manage in the popup for the full manager. The Proxies page has a Test on every row and a Test all next to the search. A test sends one request to the IP check through that proxy without changing where your tabs go, and the round trip lands in the Latency column. A failure says which kind: login refused, unreachable, timed out, or the wrong scheme for that port.
Then open Failover. It is off by default. Switched on, a connected proxy that stops answering or refuses the login is replaced by the first proxy in your fallback order that passes a test (with no order set, they are tried by name), and the pages that failed reload. Below it, switch-on-block does the same when a site you list answers 403 or 429. Two honest limits: a captcha page that answers 200 looks like a success, so it does not trigger a switch, and a rotating gateway can keep the same exit IP across one.
What it will not do
- It routes this browser and nothing else. curl, your scripts and every other app on the machine are untouched; for those, there is ProxyDesk.
- Chrome cannot send a username and password to a SOCKS5 proxy, so the extension refuses that combination there. Use the HTTP endpoint, or Firefox. The SOCKS5 vs HTTP guide explains why HTTP loses you nothing in a browser.
That is it: installed, fed, connected, checked. The whole tour of what else it does, in both themes, is on the extension page.
Top-ups start at $5.
One shared datacenter IP for 30 days is $1.25. A single gigabyte of residential is $2.40. The balance never expires.